Path Template System
What It Is
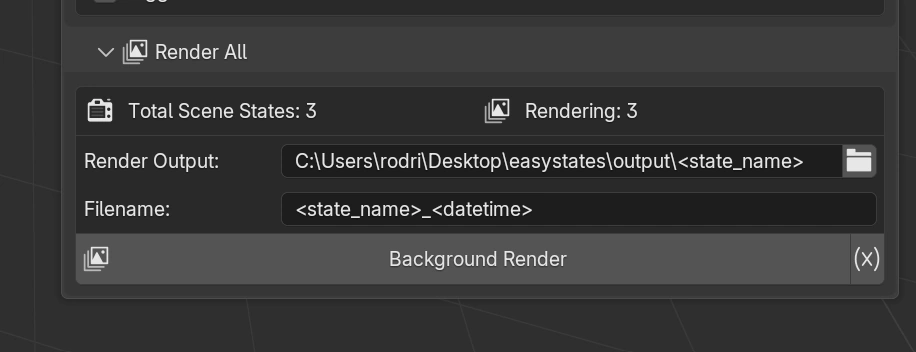
The Path Template System allows the creation of dynamic paths for files and directories based on predefined and user-created variables. The system can be used in the main EasyStates output, post-render tasks, and Blender compositor File Output nodes, enabling full control over output paths for passes.
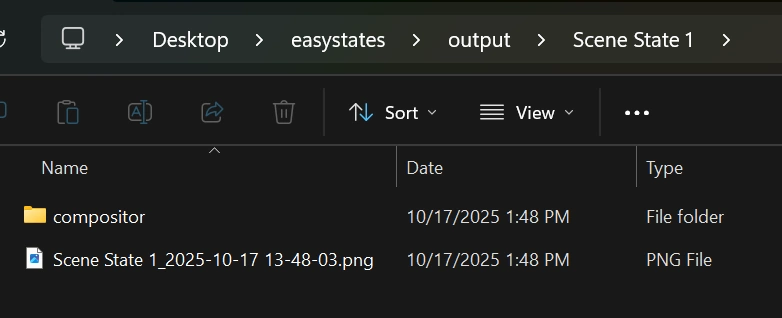
File Manager Result
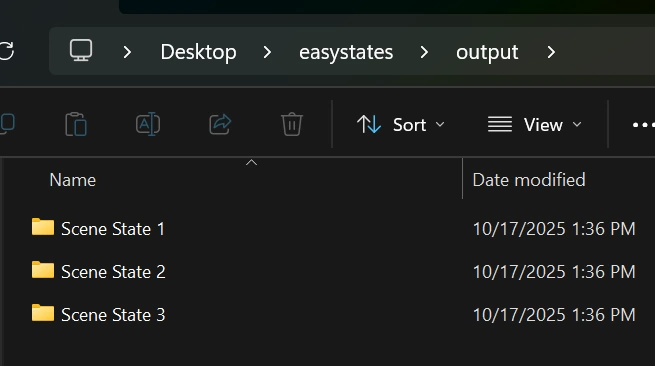
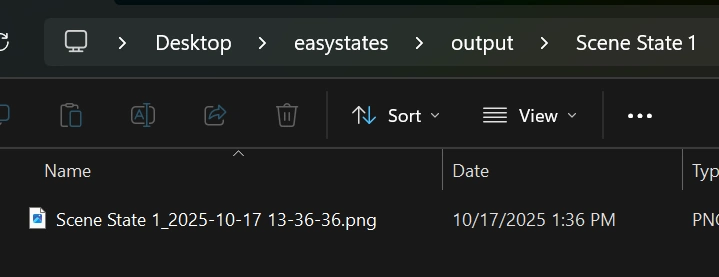
Each scene state will have its own directory and output files, organized according to the defined template.
Render Passes/Compositor File Output
The EasyStates Path Template System can also be used with Blender’s Compositor File Output Node. This allows you to define dynamic paths for each output pass based on the active scene state, using all available variables.
First, ensure that the Update File Output Nodes option is enabled in the Render Utils panel.
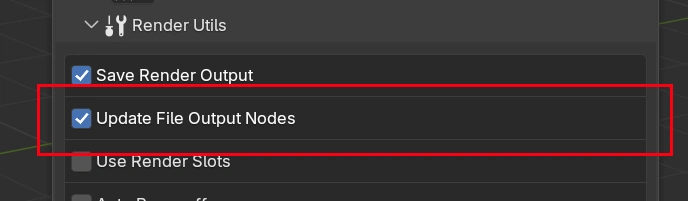
After enabling this option, you can set up the File Output node in the compositor as usual. In the output path, use the Path Template System syntax to define how the output files should be named and organized.
Tip
In this example, we will be using the <state_output_dir>, a built-in variable that points to the output directory of the current scene state.
With the configuration we set up earlier, each scene state has its own output folder, so every output file from the File Output node will be saved inside its corresponding scene state directory.
You’ll learn more about all available variables later in this documentation.
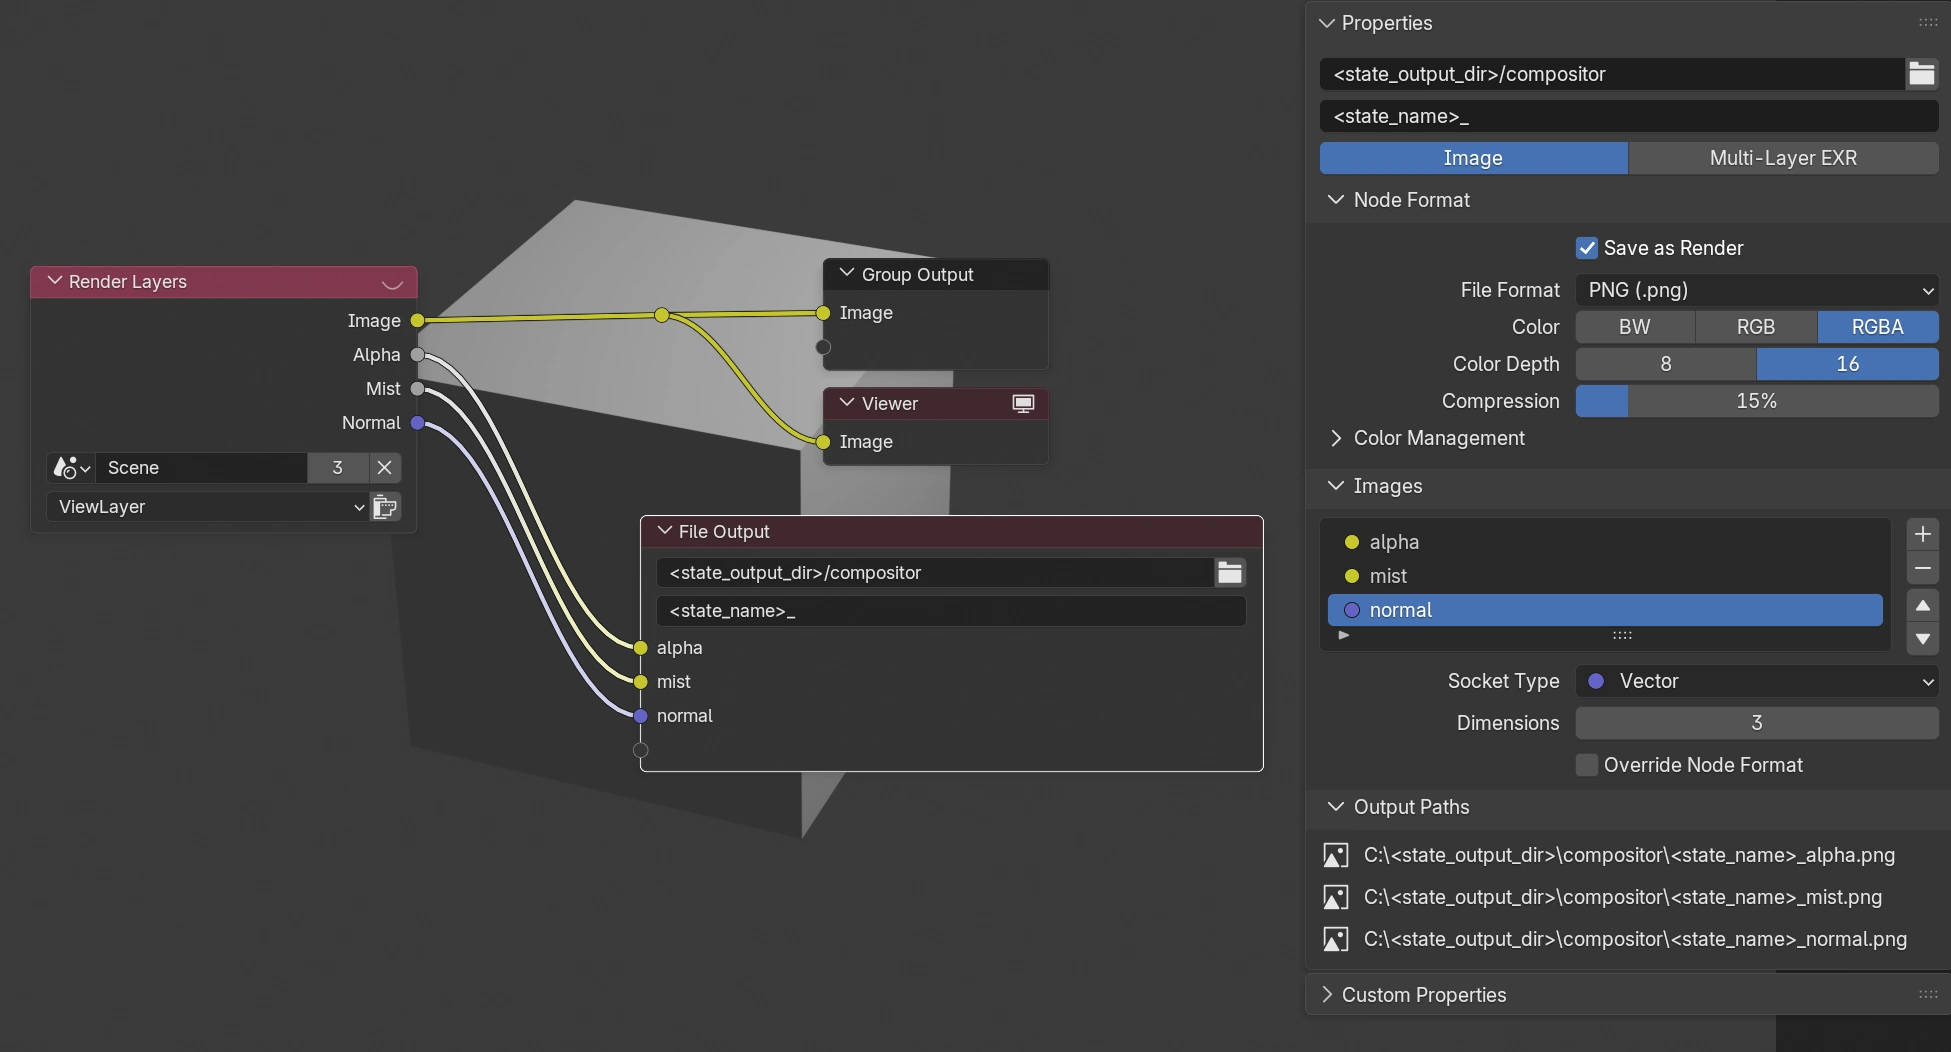
In Blender 4.5 and earlier, each output file will use the name defined in the added input. Simply name the input using the Path Template System syntax to define the output file name.

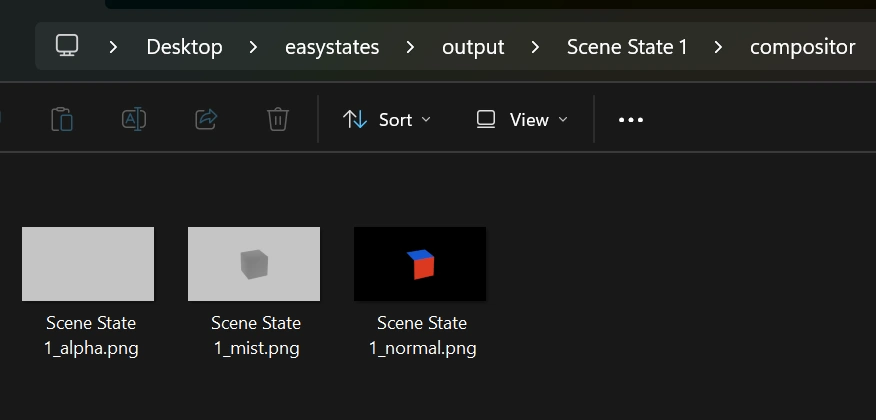
File Manager Result
As defined in the example, each scene state will have a folder called “compositor” containing its respective output files.
Available Variables
To see the variables available in the Path Template System, click the button to the right of the “Render All” button.
Clicking a variable will copy its name to the clipboard, allowing you to paste it directly where needed using Ctrl + V or Command + V. In addition to copying the variable, its description will appear at the bottom of the window, helping you understand what each variable does.
Custom Variables
In addition to predefined variables, EasyStates allows the creation of custom variables. These variables can be defined per scene, scene state, or user.
Scene Variables: Scene variables are defined within the current file and have a fixed value. They are useful for storing information that does not change between scene states, such as project name, client, delivery date, etc.
Scene State Variables: Scene state variables are saved within the scene state itself, so the same variable can have different values depending on the active scene state.
User Variables: User variables are saved in the add-on preferences, making them available for any file opened in that Blender installation. They are useful for storing information used across multiple files, such as an asset folder path.
These variables can be created directly from the variables list. Simply click the “+” button in the section where you want to create the variable (Scene, Scene State, or User), then define a name (without spaces or special characters) and a value. Once created, the variable will be available for use in the Path Template System.
Variable Types
Warning
From this point onward, we enter the advanced features of the Path Template System. Most users will not need to use these functionalities in typical workflows, but they are available for those who want to build more powerful and dynamic templates.
By default, all variables are created as Text type. However, EasyStates also supports several other variable types that are important to fully leverage the power of Variable Modifiers, a feature explained later in this documentation.
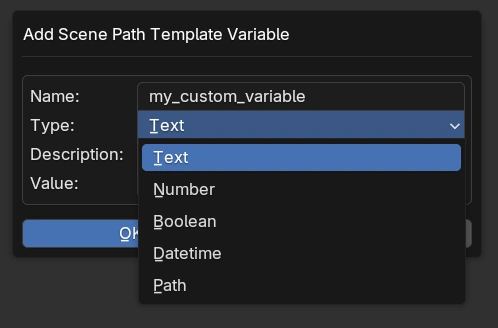
Text: The default variable type that stores string values.
Number: Stores numeric values, such as frame numbers, counters, or indexes.
Boolean: Stores True/False values, useful for toggling conditions or enabling logic-based modifiers.
Datetime: Stores date and time values, allowing for flexible date formatting through modifiers.
Path: Stores file or directory paths, useful for building dynamic output structures.
Variable Modifiers
Variable Modifiers allow you to transform or format the value of a variable before it is used in a Path Template.
They are appended to a variable using a pipe symbol (|), for example:
<scene|upper>                    → "SCENE001"
<frame|pad:5>                    → "00042"
<state_name|replace:old:new>     → "new_state"
<datetime|%Y-%m-%d>              → "2025-10-22"
<has_audio|yes?no>               → "yes"
This feature is particularly useful for formatting strings, numbers, and dates dynamically.
Practical Example
Here’s how multiple modifiers can be combined in a single path template:
<scene|snakecase>/<datetime|%Y-%m-%d_%H-%M-%S>/<frame|pad:4>.png
Result:
my_scene/2025-10-22_14-35-07/0042.png
Available Modifiers
String Modifiers
Modifier |
Description / Example |
|---|---|
|
Converts the string to title case, capitalizing the first letter of each word.
Example: |
|
Capitalizes only the first character of the string.
Example: |
|
Removes leading and trailing whitespace.
Example: |
|
Removes only the leading whitespace.
Example: |
|
Removes only the trailing whitespace.
Example: |
|
Converts CamelCase or spaced text into |
|
Converts spaced text into CamelCase.
Example: |
|
Converts all characters to uppercase.
Example: |
|
Converts all characters to lowercase.
Example: |
|
Replaces part of a string using the |
Numeric Modifiers
Modifier |
Description / Example |
|---|---|
|
Pads integer values with leading zeros up to the specified length.
Example: |
Date Modifiers
Modifier |
Description / Example |
|---|---|
|
Applies a In this example, we use the built-in variable Example usage: <datetime|%Y-%m-%d> → "2025-10-22"
<datetime|%d-%m-%Y> → "22-10-2025"
<datetime|%b_%d> → "Oct_22"
<datetime|%A> → "Wednesday"
<datetime|%H-%M-%S> → "14-35-07"
Common formatting codes:
Tip:
Combine any of these codes with safe separators ( Example (safe for filenames): <datetime|%Y-%m-%d> → "2025-10-22"
<datetime|%Y_%b_%d> → "2025_Oct_22"
<datetime|%Y-%m-%d_%H-%M-%S> → "2025-10-22_14-35-07"
Warning Avoid using slashes ( |
Conditional Modifiers
Modifier |
Description / Example |
|---|---|
|
Returns one of two values depending on the truthiness of the variable.
Example: |
Error Handling
If a modifier is used incorrectly (wrong type, missing expression, or unknown name), the system will insert a placeholder such as:
?invalid_modifier?
?invalid_pad_expression?
?invalid_date_format?
These placeholders help identify and debug formatting errors in templates.
Combining Multiple Modifiers
You can combine multiple Variable Modifiers by chaining them together using additional pipe symbols (|).
Modifiers are applied from left to right, and each modifier receives the output of the previous one.
This allows you to build powerful formatting pipelines directly inside your templates.
Example:
<scene|strip|snakecase|upper>   →  "MY_SCENE_NAME"
<category|lower|replace: :_>    →  "main_output"
<frame|pad:5>                   →  "00042"
<datetime|%Y-%m-%d|replace:-:_> →  "2025_10_22"
In this example:
stripremoves surrounding whitespace,snakecaseconverts the text intosnake_case,uppermakes the text uppercase,and
replaceswaps specific characters (in this case, converting dashes to underscores).
General rule:
You can chain any number of modifiers as long as each one receives a compatible data type.
For instance, text-based modifiers like upper or replace can be chained freely,
while date-specific modifiers (like %Y-%m-%d) require a datetime variable.
Combining Variables Inside Other Variables
In addition to using built-in and custom variables directly in your path templates, you can also define variables that reference other variables, and even apply modifiers to them.
This enables you to create complex and organized templates, breaking your logic into smaller, reusable parts.
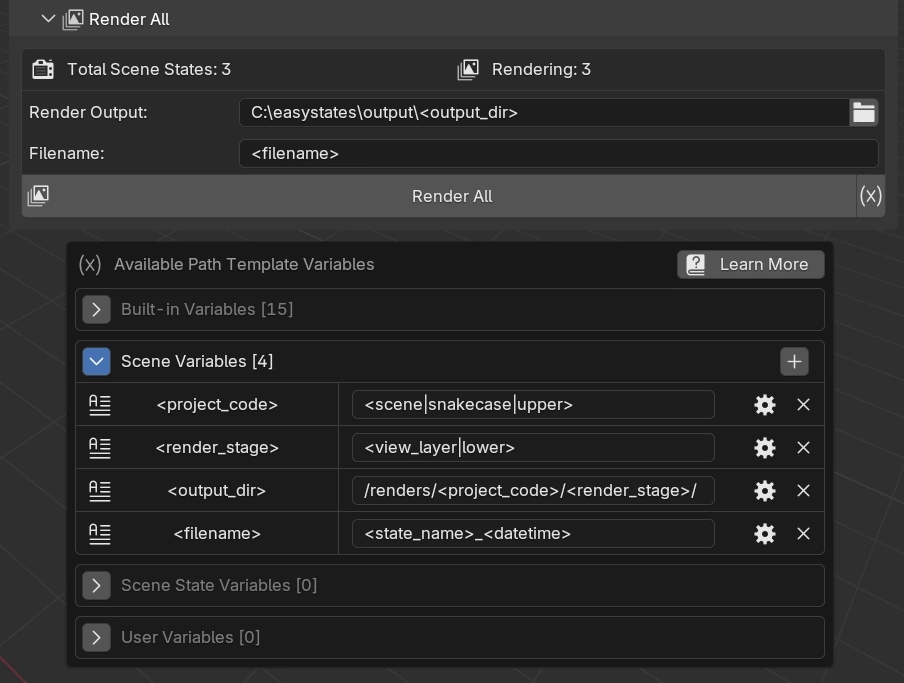
In this example, four custom scene variables are defined:
<project_code> = <scene|snakecase|upper>
<render_stage> = <view_layer|lower>
<output_dir> = /renders/<project_code>/<render_stage>/
<filename> = <state_name>_<datetime>
The variable <output_dir> combines <project_code> and <render_stage> to create a reusable portion of the path.
It is then combined with a fixed output root to form the final output directory for the scene states.
The variable <filename> combines <state_name> and <datetime> to generate the output file name.
It can be used directly in the filename property to control how rendered files are named.
For example, the final path for one of the scene states in this setup was:
C:\easystates\output\renders\MY_SCENE\viewlayer\Scene State 1_2025-10-22 15-01-57.png
Tip
Nested variables allow you to separate formatting logic into smaller steps. By combining built-in and user-defined variables with modifiers, you can create highly organized, reusable path templates.