Deadline Render Integration
What It Does
This integration allows you to send your EasyStates rendering jobs directly to Deadline Render Manager, a widely used network rendering management system in the industry. With this integration, you can take advantage of multiple machines to speed up your rendering process, making it more efficient and productive.
Installation
1. Installing in the Repository
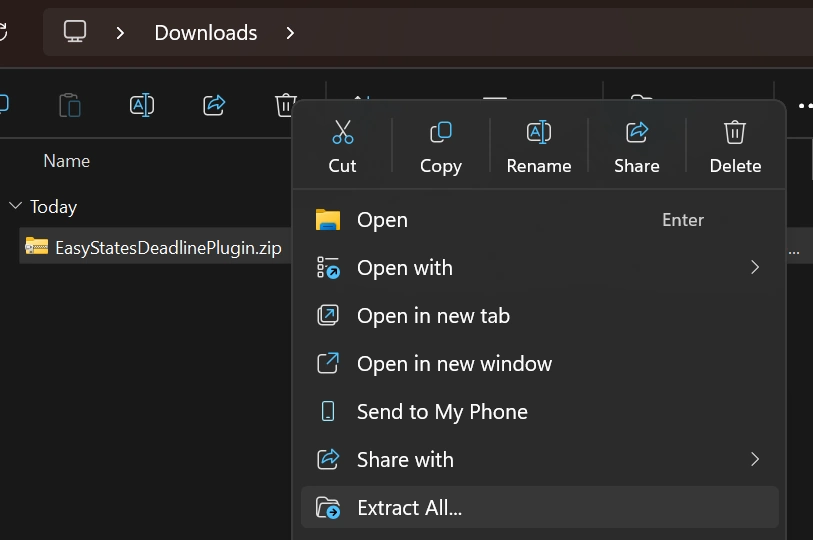
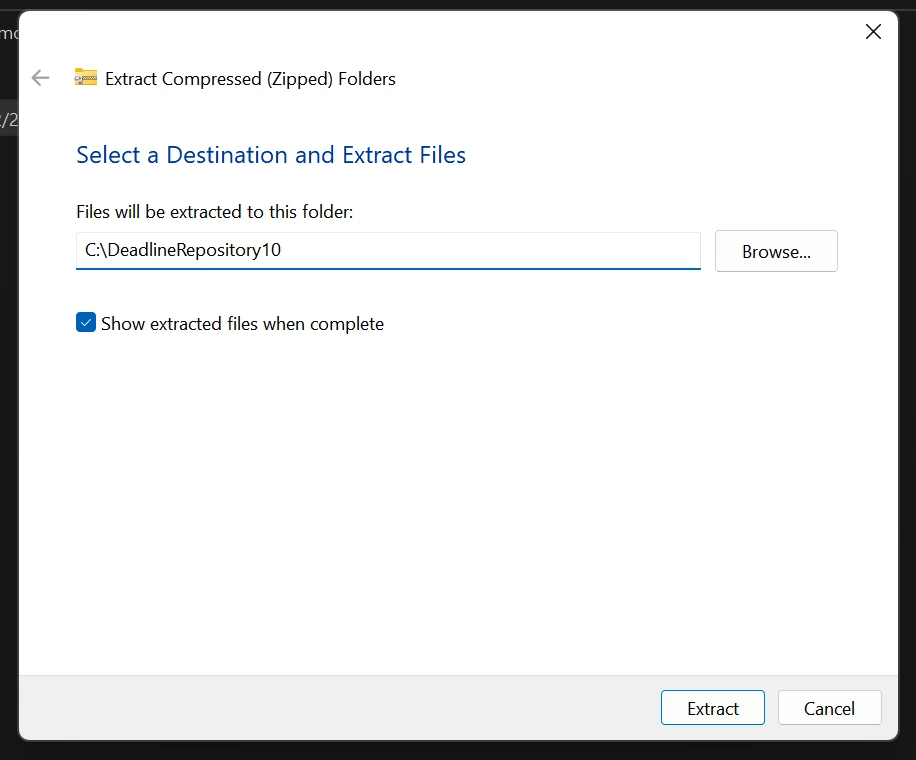
Locate the file EasyStatesDeadlinePlugin.zip in the EasyStates downloads environment. This .zip contains everything required for the integration to work — including the Blender submission add-on (installed in the next step) and the Deadline job plugin, which handles the render process.
After downloading, extract the contents of the .zip file into the Deadline Repository directory.
Note
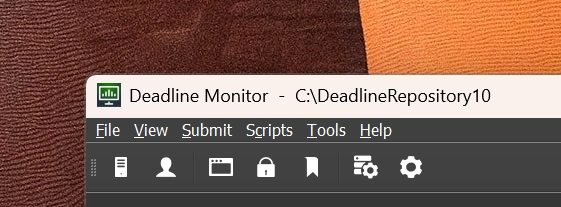
The location of the Deadline Repository may vary depending on your setup. One way to find it is to open the Deadline Monitor — at the top of the main window, you’ll see the repository path.
At the end of the extraction process, your folders should look like this:

Next, restart the Deadline Monitor so it recognizes the new render plugin.
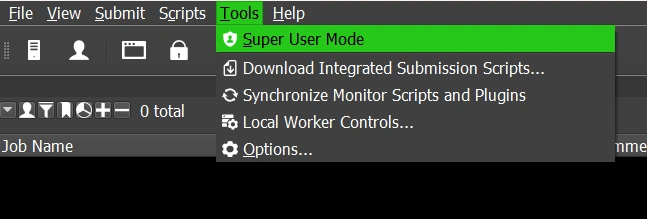
With the Deadline Monitor open, go to Tools > Super User Mode and enable Super User Mode if it isn’t already active.
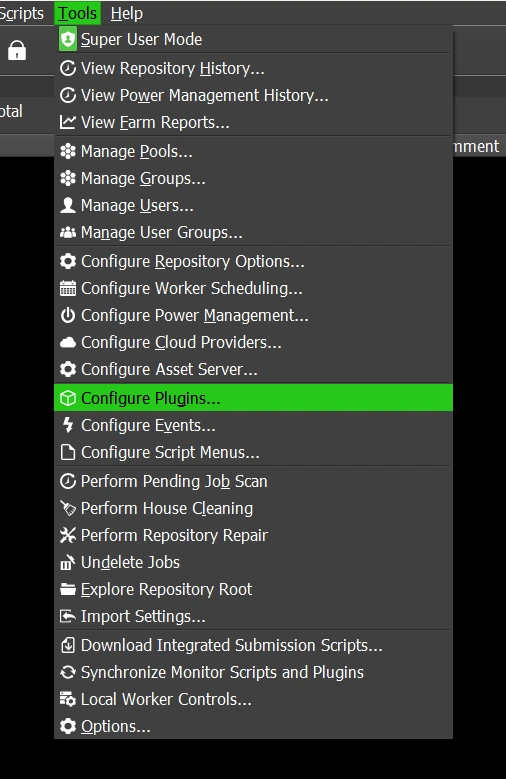
Once Super User Mode is active, go to Tools > Configure Plugins to open the Deadline plugin configuration window.
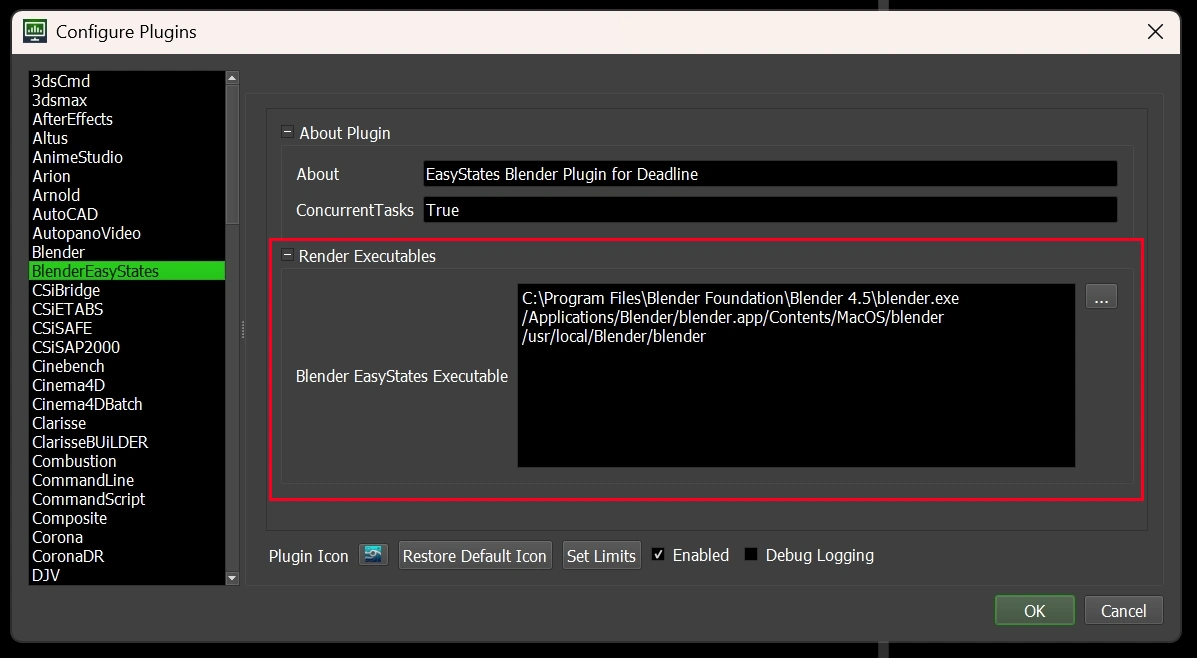
Inside the configuration window, locate the BlenderEasyStates plugin in the list on the left side and select it. under Render Executables > Blender EasyStates Executable,
add the path to the Blender executable with the EasyStates Add-on installed that is accessible by your Deadline Workers.
Note
You can add multiple paths if your Workers have different Blender installation paths. When a job starts, each Worker will use the first Blender executable it finds from this list.
Warning
Make sure the version of the EasyStates Add-on installed on the Workers’ Blender matches the version installed on the Blender used to submit jobs.
2. Installing the Blender Submission Add-on
With the previous step completed, install the Blender submission add-on. This add-on will allow you to submit EasyStates render jobs directly from Blender to Deadline.
The installation .zip file is located at:
<deadline_repository>\submission\BlenderEasyStates\Client\EasyStatesDeadlineSubmitter.zip
Note
Replace <deadline_repository> with the actual path to your Deadline Repository found in the previous step.
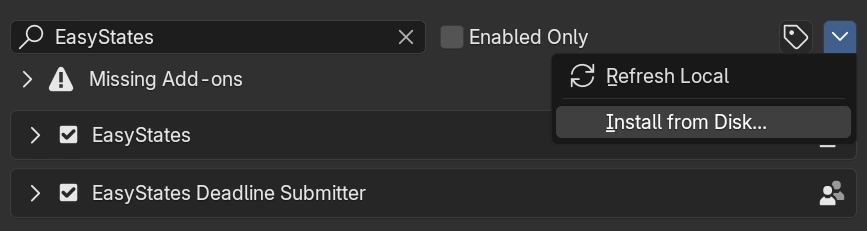
Once located, open Blender and go to
Edit > Preferences > Add-ons > Install from Disk
and select the .zip file.
After installation, enable the add-on from the Blender Add-ons list. Once activated, you will find a new button in Blender’s Render menu.

How to Submit Renders
Submitting renders follows the same flow as a local render in EasyStates:
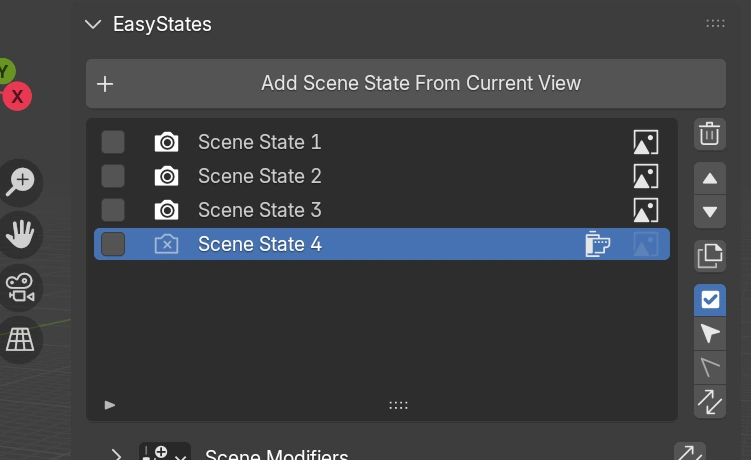
Select the States you want to render.
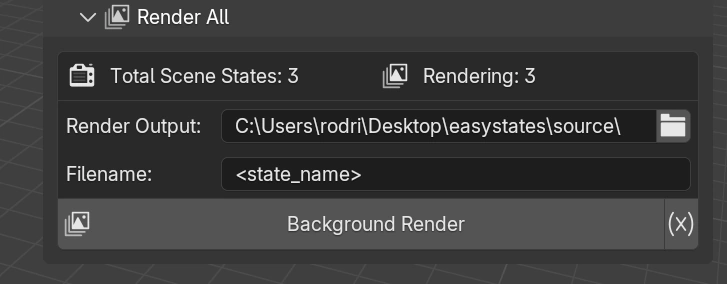
Configure the render output path in the EasyStates panel.
Warning
Ensure the output path exists and is accessible to all Deadline Workers before submitting the job.
When you’re ready to send a render job to Deadline, click
EasyStates: Submit to Deadline in Blender’s Render menu.
If the repository installation was done correctly, a new submission window will appear with Deadline submission options.
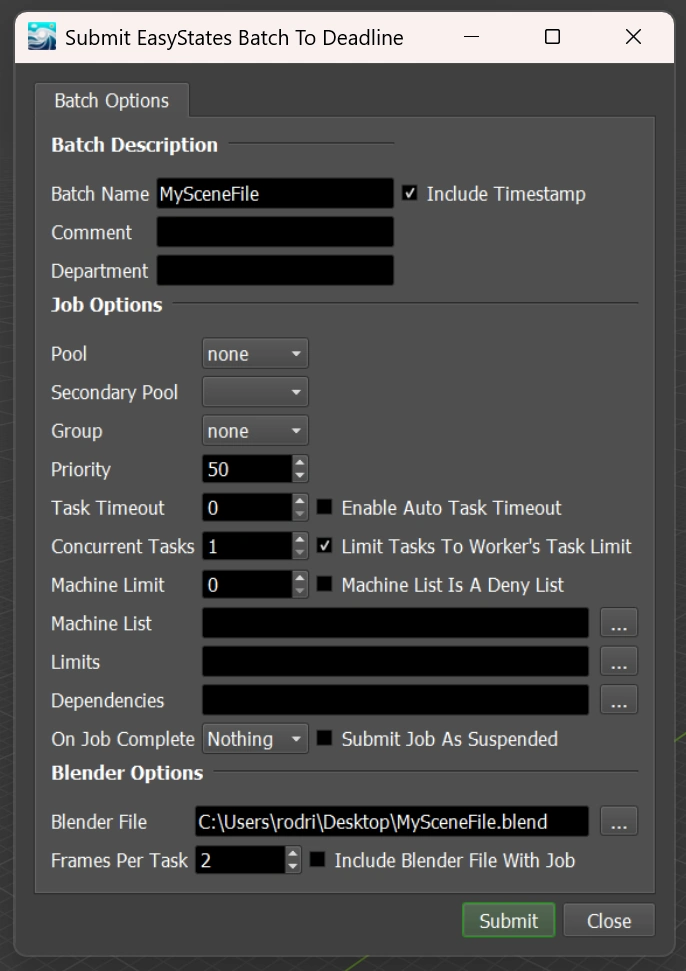
In this window, you can configure the submission according to your needs — similar to the native Blender Deadline plugin.
After setting it up, click Submit to send the batch.
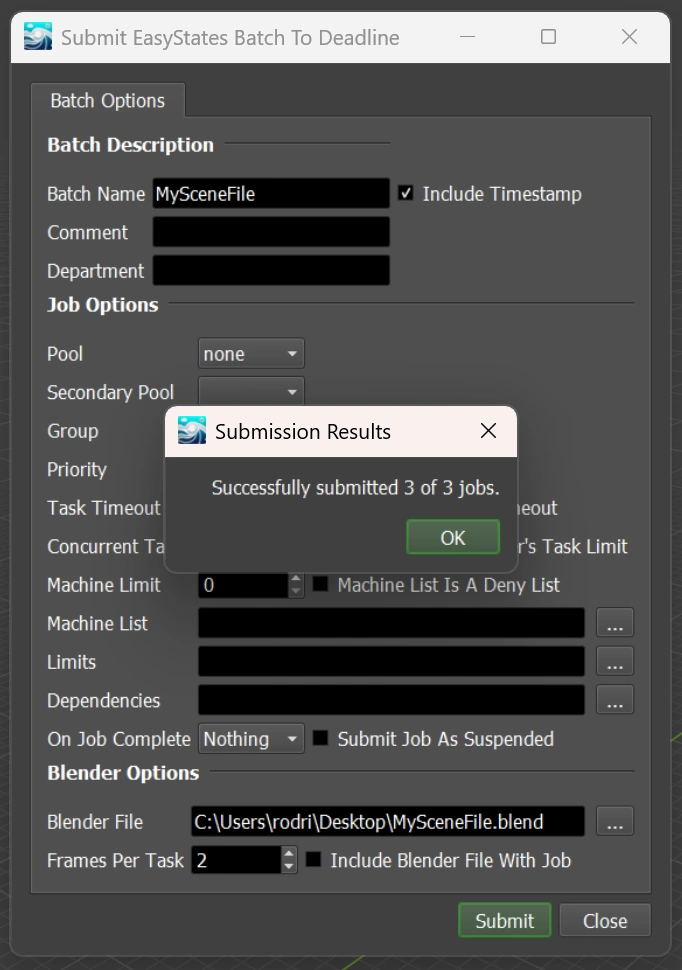
A confirmation pop-up will appear in Blender, confirming that the jobs were submitted successfully.
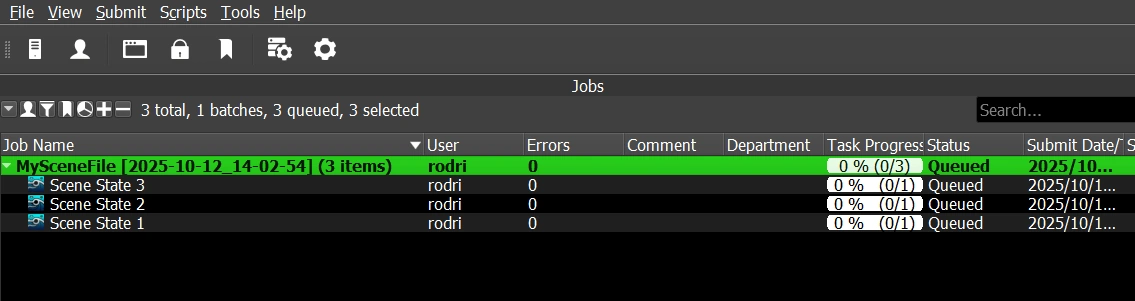
The submitted jobs should then appear in the Deadline Monitor shortly after submission.
And that’s it! You can now take advantage of Deadline’s powerful network rendering capabilities to speed up your EasyStates rendering workflow.